Adding Devices
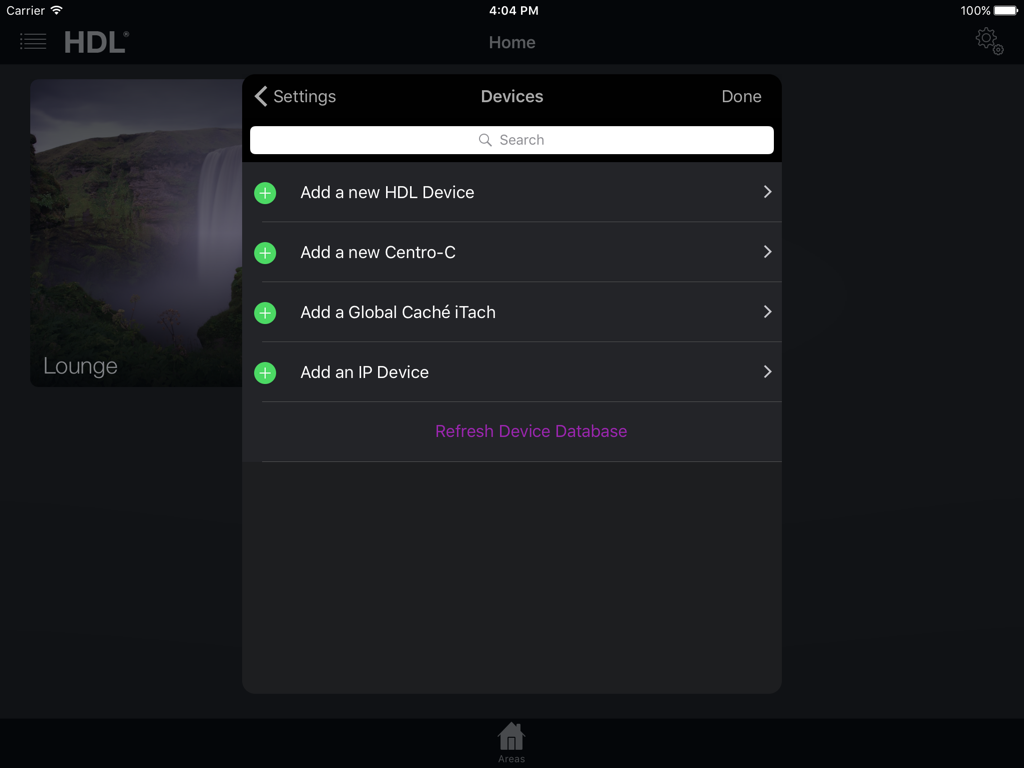
At this point, you should have created the Areas, Rooms and Circuits, but we have yet to link these controls to the physical equipment installed. From the Settings menu, select Devices and select one of the following:
- Add a new HDL Device
- Add a new Centro-C
- Add a Global Caché iTach
- Add a new IP Device
Adding and Configuring HDL Equipment
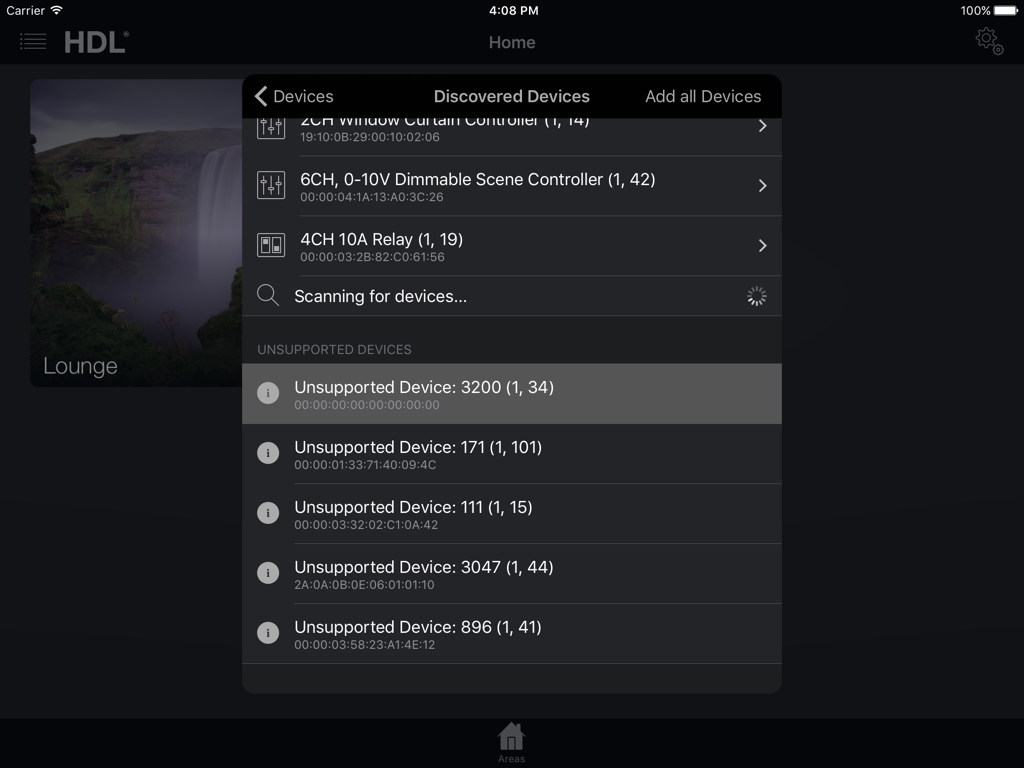
The app will scan the HDL bus & display any devices that it finds. To add a device to the project, simply click on the device & choose Add.
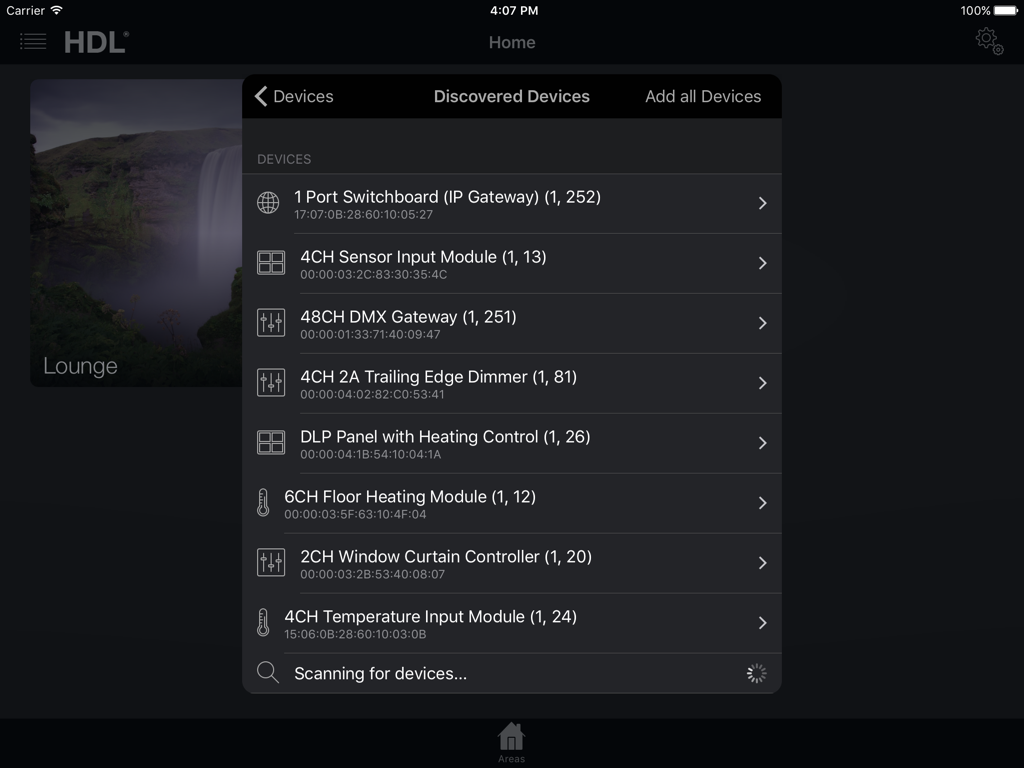
Note: If a particular device cannot be found, or is displayed as Unsupported Device, please select the Refresh Device Database option to ensure you have the latest copy of all supported devices from the Cloud system.
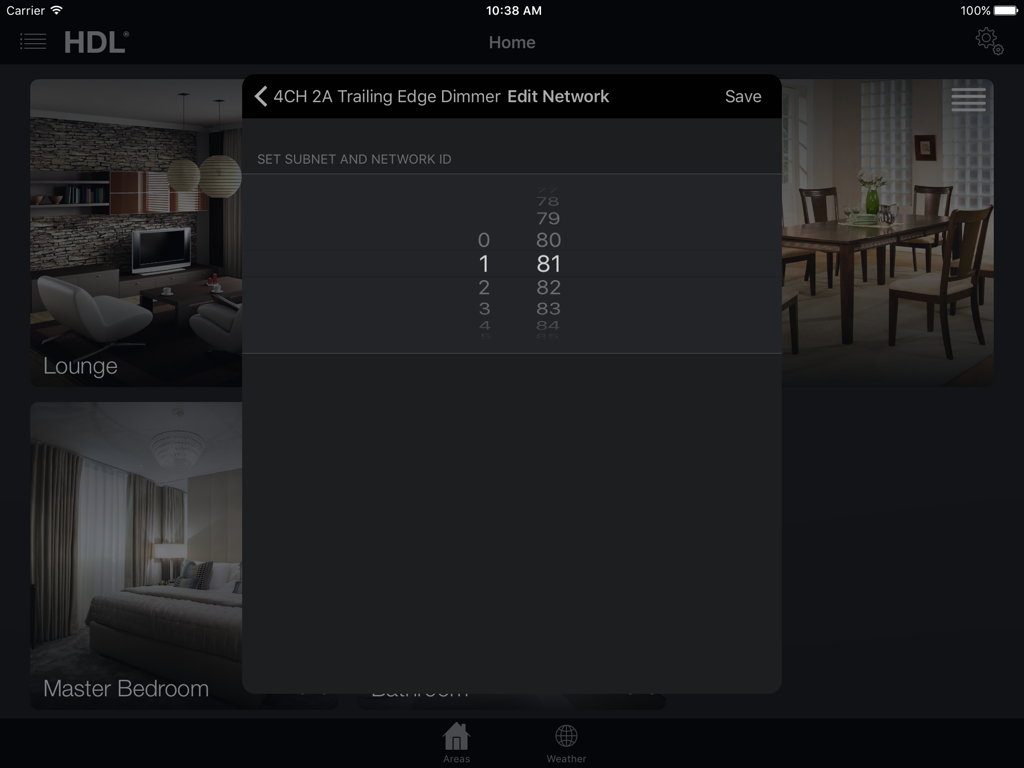
Adding Dimmers
Once a dimmer device has been added to the project, you can tap into the configuration for the device.
You can at this point choose to alter the Network Subnet / Device ID of the bus device, and set it to another Subnet / ID. Most HDL BusPro equipment is shipped from the factory with the same Subnet / Device ID, so you will want to individually address each component as you add the devices to the project, to ensure that they are all unique.
In the case of dimmers, you can also select any of the output channels and turn the circuit on / off:
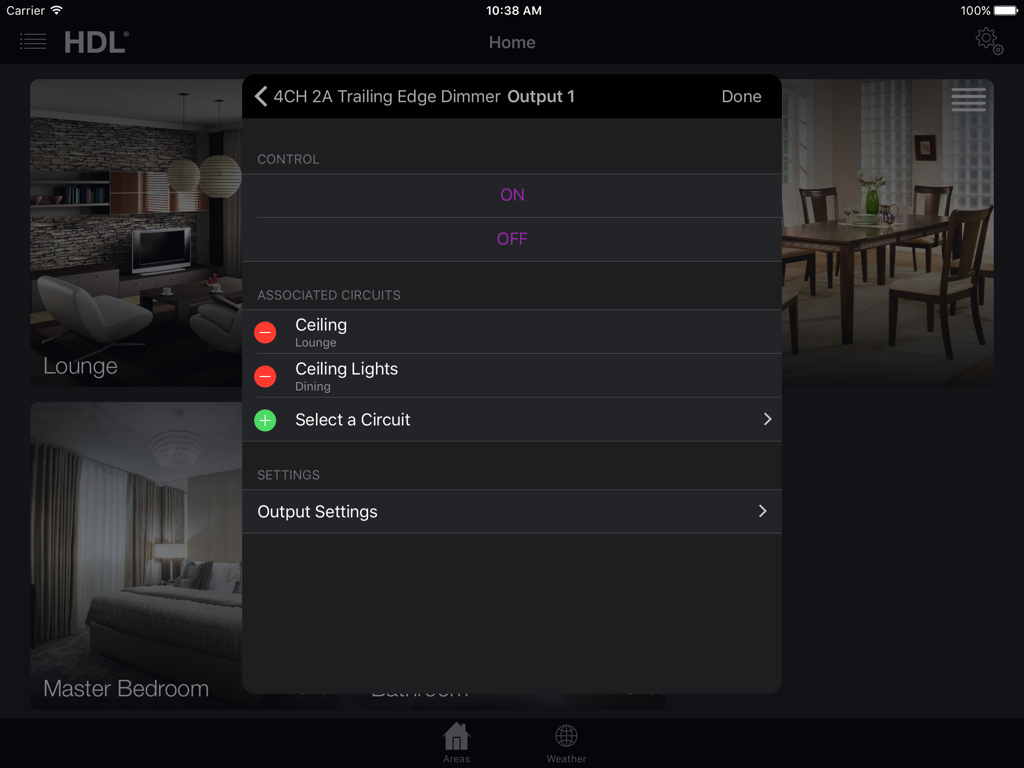
And also select the Output Settings to adjust the dimming curve etc of the device. Please refer to the HDL documentation for the specific device in question for further information.
Adding and Configuring AV Equipment
As well as controlling HDL Devices, since version 2.1.8 the app has been able to control AV Equipment via either a DemoPad Centro-C, a Global Caché IP2IR or a generic IP Socket Connection.
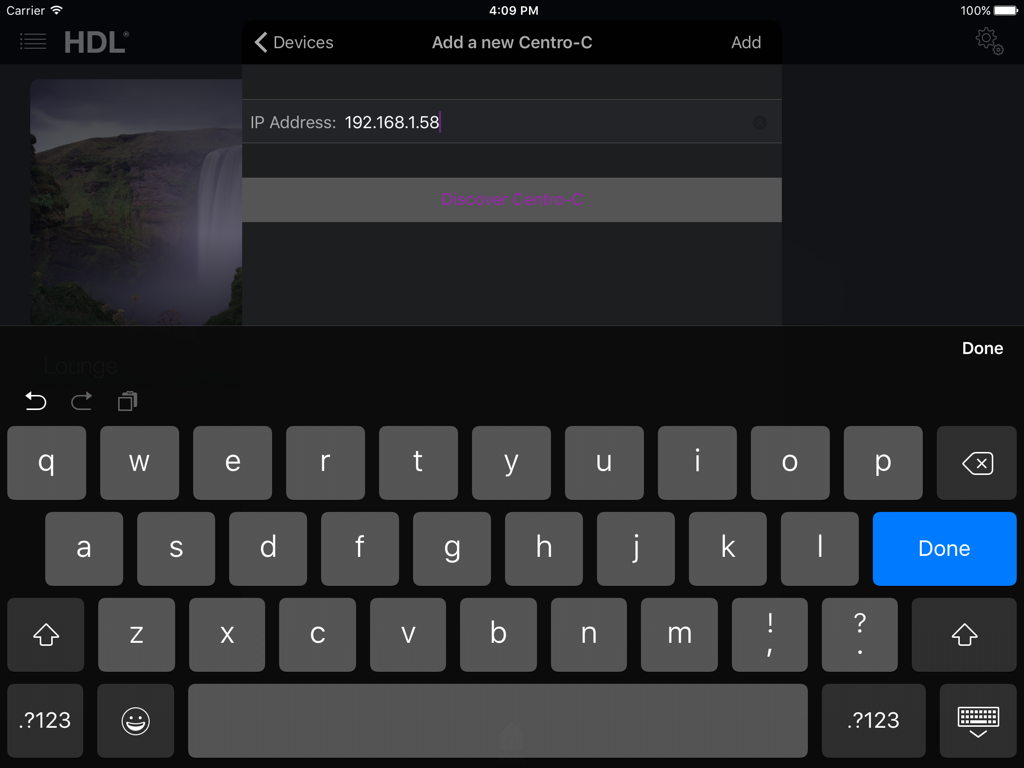
Once a Centro-C has been added, you can configure it right from within the app. E.g. set the IP address and configure the COM Ports.
Once the devices we wish to control have been added, we can then associate them with the controls.